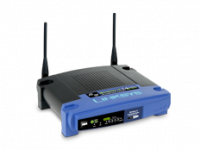
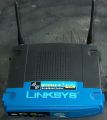
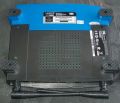
Linksys WRT54G v8.0
Linksys WRT54G v8.0
Manuf (OEM/ODM): CyberTAN
FCC approval date: 09 January 2007
Country of manuf.: China
S/N prefix: CDFF or CDFG
Series: WRT54G
Type: wireless router
FCC ID: Q87-WRT54GV8
IC ID: 3839A-WRT54GV8
Power: 12 VDC, 0.5 A
Connector type: barrel
Conn. measurements: 5.5 mm (OD), 2.1 mm (ID), 9.5 mm (LEN)
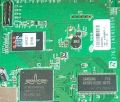
CPU1: Broadcom BCM5354
FLA1: 2 MiB2,097,152 B <br />16,384 Kib <br />2,048 KiB <br />16 Mib <br />0.00195 GiB <br /> (Eon EN29LV160AT-70TCP)
RAM1: 8 MiB8,388,608 B <br />65,536 Kib <br />8,192 KiB <br />64 Mib <br />0.00781 GiB <br /> (Samsung K4S641632K-UC75)
Expansion IFs: none specified
JTAG: yes, 12-pin header, unpopulated
Serial: yes, 5-pin header, unpopulated, (115200,8,N,1)
WI1 chip1: Broadcom BCM5354
WI1 802dot11 protocols: bg
WI1 antenna connector: fixed, non-removable
ETH chip1: Broadcom BCM5354
Switch: Broadcom BCM5354
LAN speed: 100M
LAN ports: 4
WAN speed: 100M
WAN ports: 1
bg
Stock bootloader: BSP
Stock FW OS: VxWorks
Default SSID: linksys (50 addl. devices)
Default IP address: 192.168.1.1
the IP 192.168.1.1 is used by 1317 additional devices
of which 154 are Linksys devices
Default login user: blank
Default login password: admin
blank:admin credentials used by 305 additional devices
of which 143 are Linksys devices
802dot11 OUI: 00:1A:70 (9 E, 15 W), 00:1C:10 (9 E, 16 W), 00:1D:7E (10 E, 14 W)
Ethernet OUI: 00:1A:70 (9 E, 15 W), 00:1C:10 (9 E, 16 W), 00:1D:7E (10 E, 14 W)
| CPU1 brand | WI1 chip1 brand | WI1 chip2 brand | |
|---|---|---|---|
| Linksys WRT54G v1.0 | Broadcom | Broadcom | Broadcom |
| Linksys WRT54G v1.1 | Broadcom | Broadcom | Broadcom |
| Linksys WRT54G v2.0 | Broadcom | Broadcom | Broadcom |
| Linksys WRT54G v2.2 | Broadcom | Broadcom | Broadcom |
| Linksys WRT54G v3.0 | Broadcom | Broadcom | Broadcom |
| Linksys WRT54G v3.1 | Broadcom | Broadcom | Broadcom |
| Linksys WRT54G v4.0 | Broadcom | Broadcom | Broadcom |
| Linksys WRT54G v5.0 | Broadcom | Broadcom | Broadcom |
| Linksys WRT54G v6.0 | Broadcom | Broadcom | Broadcom |
| Linksys WRT54G v7.0 | Atheros | Atheros | |
| Linksys WRT54G v7.2 | Broadcom | Broadcom | |
| Linksys WRT54G v8.0 | Broadcom | Broadcom | |
| Linksys WRT54G v8.1 | Broadcom | Broadcom | |
| Linksys WRT54G v8.2 | Broadcom | Broadcom | |
| Linksys WRT54GH | Ralink | Ralink |
For a list of all currently documented Broadcom chipsets with specifications, see Broadcom.
Wireless-G Broadband Router
- "3763-14141905R" is silkscreened on the board.
Links of Interest
- • Support page • (Template link outdated)
- Downloads (US)
- WRT54G series on Wikipedia
- Linksys WRT54Gxx page on the DD-WRT wiki
- Linksys WRT54G v8 and v8.2 page on the DD-WRT wiki
- WRT54G page on the OpenWrt wiki
- Datasheet.pdf
- Quick Install.pdf
- User Guide.pdf
- wrt54g V8 help?
Flashing
Linksys WRT54G-LA is a Linksys WRT54G v8.0
| NOTE: During configuration or flashing a device, the only things that should be hooked to the device is the computer and power. |
Flashing DD-WRT
| WARNING: Requires Micro for DD-WRT, Do not flash anything else! |
| WARNING: Requires K2.4 for DD-WRT, Do not flash anything else! |
by clock
Background Preparation
- Failing to prepare and do your background research can cause considerable frustration, loss of time, and render your modem absolutely useless (bricked). In other words, you may have to literally throw it away. With an hour or so of research, you'll save hours of time in frustration.
- Before you begin, it is recommended that you look through the installation wiki Installation (particularly its precautions - not necessarily its implementation per se). Also, the notorious peacock thread [1], and basic techniques such as Hard reset or 30/30/30 and TFTP flash. These may have some sections in some pages that are not relevant, which you can skim.
- You will need to review many of the recommended sites to download below. You'll want to save this page (see below) and come back here, but you will want to get the background first. Be careful about implementation on the wiki. Come back here for the best guide for your modem.
- According to multiple sources (peacock, wiki), you are going to do almost everything offline with a LAN connection (how to Disable your wireless). The wiki recommends that you download everything you need before you start. Given the many types of problems you can encounter that can prohibit you from getting help, the process of reactivating and deactivating your security settings if you actually can get back online, and the likelihood for browser crashes if you try to just keep the pages up, this makes a lot of sense.
- Make sure to save all webpages as HTML. Do not save as compressed html files (some computers default to that) or bookmarks. Do not skip the saving step.
- Here are the websites to save:
- This page.
- The peacock thread [2].
- The wiki Installation.
- Recover from a Bad Flash.
- FAQ's
- Tftp Flash instruction TFTP flash. It describes how you may have to enable Tftp, which is very quick and easy (just one check box).
- The wikipedia instructions for Compound TCP, if applicable [3].
- In addition, you will probably also need:
- The Tftp.exe file (execute it from the Tftp TFTP flash link above, and just leave it open.)
- First ("killer") flash file vxworkskillerGv8-v3.bin.
- Second (DD-WRT) flash file dd-wrt.v24_micro_generic.bin.
Before Implementation
- Do not try to skimp on the Hard reset or 30/30/30 reset before or after each change to your router's firmware. The peacock thread goes into extensive justifications. (clock used a stopwatch.) Be sure to follow all power cycling and reset instructions as described.
- The wiki recommends that you only use Internet Explorer as a browser for this process.
- Log off your wireless (see the right way to do it).
- Disable all firewalls and security (how to Disable Security. You should do this AFTER you are offline. Restore before you go back online, something your browser may automatically prompt you to do.
Implementation
- Configure your computer's local lan ethernet address to 192.168.1.100, subnet 255.255.255.0, gateway 192.168.1.1 (this is for Linksys/most modems). (How to Change Ethernet Address). Then connect an Ethernet cable to your computer and port 1 of your router. (Do Not Use Wireless)
- Power cycle (ie, unplug the power cord from the router).
- Perform a Hard reset or 30/30/30 reset.
- If you are using certain operating systems, such as Window's Vista, an additional step to Disable Compound TCP may be required.
- Open your browser to http://192.168.1.1.
- (Note: Some people, such as sth had problems with Firefox (in June 2008), while others, such as dennisn had no such problems with Firefox 3.0.3 in Dec 2008), with the next step (and later on when trying to save changes in dd-wrt's web gui). Sth had to Recover from a Bad Flash.)
- Use the firmware upgrade dialog to flash vxworkskillerGv8-v3.bin. (clock found that this step did not necessarily go smoothly (browser error screen). Despite this, the next few steps did work. Please note below for the work-around and Pinging.). If a page opens that says "Management Mode", close your browser and try again. (It may take a couple times.)
- WAIT for at least two minutes before you continue! (longer is better) Give vxworks killer plenty of time to do its magic! After the 2 minutes is up, if you notice a dialog asking you to reboot the router, go ahead and power cycle the router by unplugging the power cord and plugging it back in again.
- You will not be able to browse the WRT54 at this point, but you should be able to ping 192.168.1.1. If the router doesn't reply you haven't set your computer's network settings correctly (on step 1)
- Now it's time to flash the DD-WRT firmware using TFTP.
- For Windows, enter
tftp -i 192.168.1.1 put dd-wrt.v24_micro_generic.binat yourcmdshell (Vista users will need to install TFTP first) If you don't wish to use command line, follow the instructions for using the tftp.exe program (at note 11 of the peacock thread announcement [4]). (The peacock thread will redirect you to Tftp flash for more specific instructions based on your operating system. This is a good resource and may be all you need - clock). - For Linux (distros other than Debian or Ubuntu), enter
tftp -m octet 192.168.1.1 -c put dd-wrt.v24_micro_generic.bin
- For Windows, enter
Debian or Ubuntu -- The above instructions won't work. Open Terminal and run:
~$: tftp 192.168.1.1.
tftp> mode binary
tftp> rexmt 1
tftp> timeout 60
tftp> put dd-wrt.v24_micro_generic.bin
- Alternatively for Linux (ie. if you get "error code 3" while trying to flash it), enter
atftp --option "mode octet" --verbose -p -l dd-wrt.v24_micro_generic.bin 192.168.1.1 - For OSX, enter
tftp -e 192.168.1.1. At thetftp>prompt enterput dd-wrt.v24_micro_generic.binat your shell
- Alternatively for Linux (ie. if you get "error code 3" while trying to flash it), enter
- The file will now be transfered and flashed to your router. After this is done, dd-wrt will automatically boot. WAIT for at least two minutes before you continue! (longer is better) Give the router plenty of time to to boot. Make note (perhaps copy) any on-screen instructions.
- Perform a Hard reset or 30/30/30 reset again.
After about a minute, you can browse dd-wrt on your router at http://192.168.1.1. According to the Peacock thread, if the hard reset was done correctly, you will be asked to change your password when you get to the webgui. (clock found this to be true.)
You may then go on to any of the other options you wish to pursue, such as linking routers. Please see the Peacock thread to make sure that you are pursuing the correct one - do not assume! clock.
If you had previously flashed your router with a beta/RC version of v24 and are currently experiencing issues with LAN port 4 and/or wireless, an upgrade to the CFE-Updater and v24 stable should fix it.
Be sure to use the webgui to update to a newer build such as 12548 Newd_Micro.bin once you have dd-wrt running. See the peacock thread announcement for further information. http://www.dd-wrt.com/phpBB2/viewtopic.php?t=51486 When selecting a build, do not use any build with NEWD2 in the name. NEWD Micro Only!
Check for recommended builds here.
Upgrading
Updating DD-WRT
If dd-wrt is already on the router follow these instructions. If stock firmware is on the router follow the flashing instructions.
- Check for recommended builds here first.
- Set your computer to a static IP of 192.168.1.7. (or to whatever subnet the router is on) Disable all firewalls and security. Disable wireless on your computer and only have the router connected to the flashing computer by the ethernet cable between the two.
- Hard reset or 30/30/30 (If the router supports it, if not, reset to defults in the GUI) prior to flashing. Wait. Check for password page on re-login and change password.
- Flash firmware. You can use the webgui except if you have a belkin router. (For belkin use tftp.exe to flash)
- Wait...at least three minutes. Lights should return to normal. See important2, below. Failing to wait is how most people brick their routers.
- Do a power cycle of the router. (Unplug the cord, count to 30 and plug it back in.)
- Wait for the lights to return to normal usually about 2 minutes.
- Hard reset or 30/30/30 again (If the router supports it, if not, reset to defults in the GUI). Wait. Check for the password page and re-login to change the password. Then you can reconfigure your settings manually.
- Once configured set your computer back to autoIP and autoDNS.
Important1: This Hard reset or 30/30/30 works fine for Asus router, but you do have to power cycle after the reset.
Important2: After you flash the firmware, and before you do the hard reset, the router will be building some nvram settings. YOU MUST WAIT FOR THIS TO FINISH PRIOR TO DOING ANYTHING WITH THE ROUTER INCLUDING A HARD RESET. Usually, you can tell when this process is completed by the WAN light coming on, but it does take several minutes. Go have a beer. There are starting to be more and more people who BRICK their routers by not waiting until the nvram is rebuilt, PRIOR to doing a hard reset. YOU NEED TO WAIT!
Reverting
Reverting to OEM Firmware from DD-WRT
- Open the Administration tab in dd-wrt and choose the Firmware Upgrade Tab
- Choose reset to default settings from the drop down.
- Browse and select vxworksrevert-Gv8-v3.bin. It will install the revert firmware and give you a rebooting indicator on the screen. When it is done it will give you a Confirm button on the screen. Click on Confirm. Your power light will be flashing on your router.
- Power cycle the router by unplugging the power cord and plugging it in again.
- Open your browser and enter into the address bar http://192.168.1.1
- Use the firmware upgrade dialog to flash your original linksys firmware WRT54Gv8_v8.00.0_fw.bin. When the upgrade success screen comes up wait 2 minutes.
- Power cycle the router by unplugging the power cord and plugging it in again.
- Open your browser and enter into the address bar http://192.168.1.1
You are now back to your factory firmware.
JTAG-Serial Info
JTAG
JTAG Pinouts
 nTRST   1o o2	GND
   TDI   3o o4	GND
   TDO   5o o6	GND
   TMS   7o o8	GND
   TCK   9o o10	GND
 nSRST  11o o12  N/C
Using Universal JTAG Adapter
 white    1o o2	 black
   red    3o o4	 GND
  blue    5o o6	 GND
 green    7o o8	 GND
 yelow    9o o10  GND
 orange  11o o12  N/C
DD-WRT JTAG Recovery
- /noreset switch required
- Backup CFE x2 (Compare the files, they must match exactly or there is something wrong with your JTAG setup)
- Erase Wholeflash x2
- Flash CFE
- Unplug Power
- Unplug JTAG Cable
TFTP:
- Set Rig ip static 192.168.1.10
- Plug network cable from rig to port 1
- Get TFTP ready, server ip - 192.168.1.1, Password - blank, file - dd-wrt.v24_micro_generic.bin
- Plug in power
- As soon as windows says "connected" hit upgrade. May have to use a network hub to make sure windows is
- Hard Reset 30\30\30
Serial
Serial Pinouts
 VCC  1 o
  TX  2 o
  RX  3 o
 N/C  4 o
 GND  5 o
Hyper terminal Setup in Windows XP
In Windows XP, Click Start Button - All Programs - Accessories -
   Communication - HyperTerminal
Enter a name for the connection, Click ok
Choose com port you adapter is plugged into, Click ok
Set:
 Bits per second = 115200
 Data Bits = 8
 Parity = none
 Stop bits = 1
 Flow control = none
Click ok
Click File - Save As, and select a place to save it to so you
             don't have to enter the settings again.
Putty Setup in Windows XP
After installing putty, run it
 Serial line = The COM port your using for serial (ie. COM3)
 Speed = 115200
Click on Serial under Connection
 Serial line to connect to = same as above (Serial line)
 Speed (baud) = 115200
 Data bits = 8
 Stop bits = 1
 Parity = none
 Flow control = none
Click Session
 Enter a name for your connection under saved sessions
Click Save
Click Open
DD-WRT Serial Recovery
Modified Redhawk0 instructions
- Connect Serial cable
- Start one of the programs from above
- Get TFTP ready with file selected
- Use dd-wrt.v24_micro_generic.bin
- Connect power to the router
- start a rapid fire Cntl-C as you plug the router to power
- type "nvram erase" w/o quotes, hit enter
- type "flash -noheader : flash1.trx" w/o quotes, this starts the tftp daemon, hit enter
- but have tftp.exe ready
- Click go or start on TFTP
- give it 5 minutes after it finishes
- then power cycle....hard reset...then config
- when it stops spitting out txt in the serial consol....hit the enter key...you should get a login prompt...at that point, power cycle it, Hard reset or 30/30/30...then config
- you'll see it boot up
vlan Info
DD-WRT vlan Info
Confirmed the WRT54G v8.0 supports port-based vlans via the GUI.
Confirmed the WRT54G v8.0 supports port-based vlans via nvram with micro-plus-SSH.
WRT54G v8.0's ports are mapped like this:
1 2 3 4 | case labels
3 2 1 0 | nvram port numbers
Defaults
root@DD-WRT:~# nvram show | grep vlan.ports
vlan1ports=4 5
vlan0ports=3 2 1 0 5*
size: 17332 bytes (15436 left)
root@DD-WRT:~# nvram show | grep port.vlans
port5vlans=0 1 16
port4vlans=0
port3vlans=0
port2vlans=0
port1vlans=0
port0vlans=1
size: 17332 bytes (15436 left)
root@DD-WRT:~# nvram show | grep vlan.hwname
vlan1hwname=et0
vlan0hwname=et0
size: 17332 bytes (15436 left)
root@DD-WRT:~# lsmod
Module                  Size  Used by
ip_nat_pptp             2192   0 (unused)
ip_conntrack_pptp       2524   1
ip_nat_proto_gre        1552   0 (unused)
ip_conntrack_proto_gre    2312   0 [ip_nat_pptp ip_conntrack_pptp]
switch-robo             5036   0 (unused)
switch-core             5984   0 [switch-robo]
root@DD-WRT:~# ls /proc/switch
eth0
root@DD-WRT:~# cat /proc/switch/eth0/vlan/0/ports
0       1       2       3       5t*
root@DD-WRT:~# cat /proc/switch/eth0/vlan/1/ports
4       5t
root@DD-WRT:~# cat /proc/switch/eth0/vlan/2/ports
4
root@DD-WRT:~#
Commands
root@DD-WRT:~# nvram set vlan1ports="3 4 5"
root@DD-WRT:~# nvram set vlan0ports="2 1 0 5*"
root@DD-WRT:~# nvram commit
root@DD-WRT:~# reboot
nvram
root@DD-WRT:~# nvram show | grep vlan.ports
vlan0ports=2 1 0 5*
vlan1ports=3 4 5
size: 17578 bytes (15190 left)
root@DD-WRT:~# nvram show | grep port.vlans
port5vlans=0 1 16
port3vlans=0
port1vlans=0
port4vlans=0
size: 17578 bytes (15190 left)
port2vlans=0
port0vlans=1
root@DD-WRT:~# nvram show | grep vlan.hwname
vlan1hwname=et0
size: 17578 bytes (15190 left)
vlan0hwname=et0
root@DD-WRT:~#
GUI
root@DD-WRT:~# nvram show | grep vlan.ports
vlan1ports=4 5
vlan0ports=3 2 1 0 5*
size: 17471 bytes (15297 left)
root@DD-WRT:~# nvram show | grep port.vlans
port5vlans=0 1 16
port4vlans=1 18 19
port3vlans=0 18 19
port2vlans=0 18 19
port1vlans=0 18 19
port0vlans=1 18 19
size: 17471 bytes (15297 left)
root@DD-WRT:~# nvram show | grep vlan.hwname
vlan1hwname=et0
vlan0hwname=et0
size: 17471 bytes (15297 left)
root@DD-WRT:~#
Pictures
Notes
DD-WRT Notes
- In Vista/IE, after attempting to upload the initial killer software, the process appeared to not work several times as dd-wrt-wiki:User:Clock clock received a browser error screen. The modem looked like it may be bricked (broken). The Peacock thread [5] said, "If reply has TTL of 100, the bootloader (CFE) is responding. This is the best time to start the TFTP transfer. In most cases you should be able to flash dd-wrt firmware if you are getting any ttl=100 responses." The user was able to do the subsequent tftp using the tftp.exe referenced in previous sections.
A CFE compressor is available for the Gv8.0, and 8.2. It enables micro_plus to be put on the router. Click here.
DD-WRT v24 RC1 micro supports this router.
[DD-WRT v24 RC3] The the WRT54 Gv8 and WRT54GSv7 is now fully supported, but requires a special flashing procedure (which is simpler than the v5 and v6 vxworks killer procedure).
See http://www.dd-wrt.com/phpBB2/viewtopic.php?t=20095
[DD-WRT v24 RC4] There are some issues with RC3 which are resolved in RC4. CFE update is critical if updating from RC3. There is an issue with port 4 not working on some routers using RC4.
[DD-WRT v24 RC5] How To Flash the WRT54Gv8 Just follow the instructions as listed, be sure to restart your modem when the install is finished and don't forget the login is root with a password of admin. headpin11
[DD-WRT v24 RC6.2] Supported -> Broadcom Generic / Micro
[DD-WRT v24 Final] As of late April 2008, the WRT54G v7.2 is now supported via the micro version of DD-WRT. (Note that the micro and the mini versions are different. For the differences, read What is DD-WRT?).
Eko's detailed instructions are HERE in English, German, and French.
And the relevant files are HERE.
The best thread in the forums on this topic is HERE.


